Many of you may be wondering exactly how to add a background to your blogger template. Well the answer to this question is probably easier than you think. Read on to find out how...
1. Start by selecting an image you would like to use as your blogger background. You can use a photograph, or create your own custom background using a photo editing software. For those of you who would like to create a custom background, but do not have a photo editing software install on your computer, you may want to consider downloading a free (open source) photo editing software such as GIMP, InkScape or both.
(A word about GIMP and InkScape - These two programs are best used in combination with one another if you are looking for an open source photo editing solution. GIMP is a bitmap graphics editor, while Inkscape is a vector graphics editor. To find out more about what that means Click Here and read the section on "What is Vector Graphics." Personally I like to use both in combination with Photoshop.)
2. After you have selected/created your image, you will need to upload your image to a video and image hosting site. There are many different free video and image hosting sites, and it doesn't matter which one you use. Personally I like to use Photobucket.
2. After you have selected/created your image, you will need to upload your image to a video and image hosting site. There are many different free video and image hosting sites, and it doesn't matter which one you use. Personally I like to use Photobucket.
3. Once you have your image uploaded to an image hosting site, then you are ready to begin. Start by logging into your blogger account. You will want to access your dashboard, so that you can see the "Layout" section of your blog as shown below:
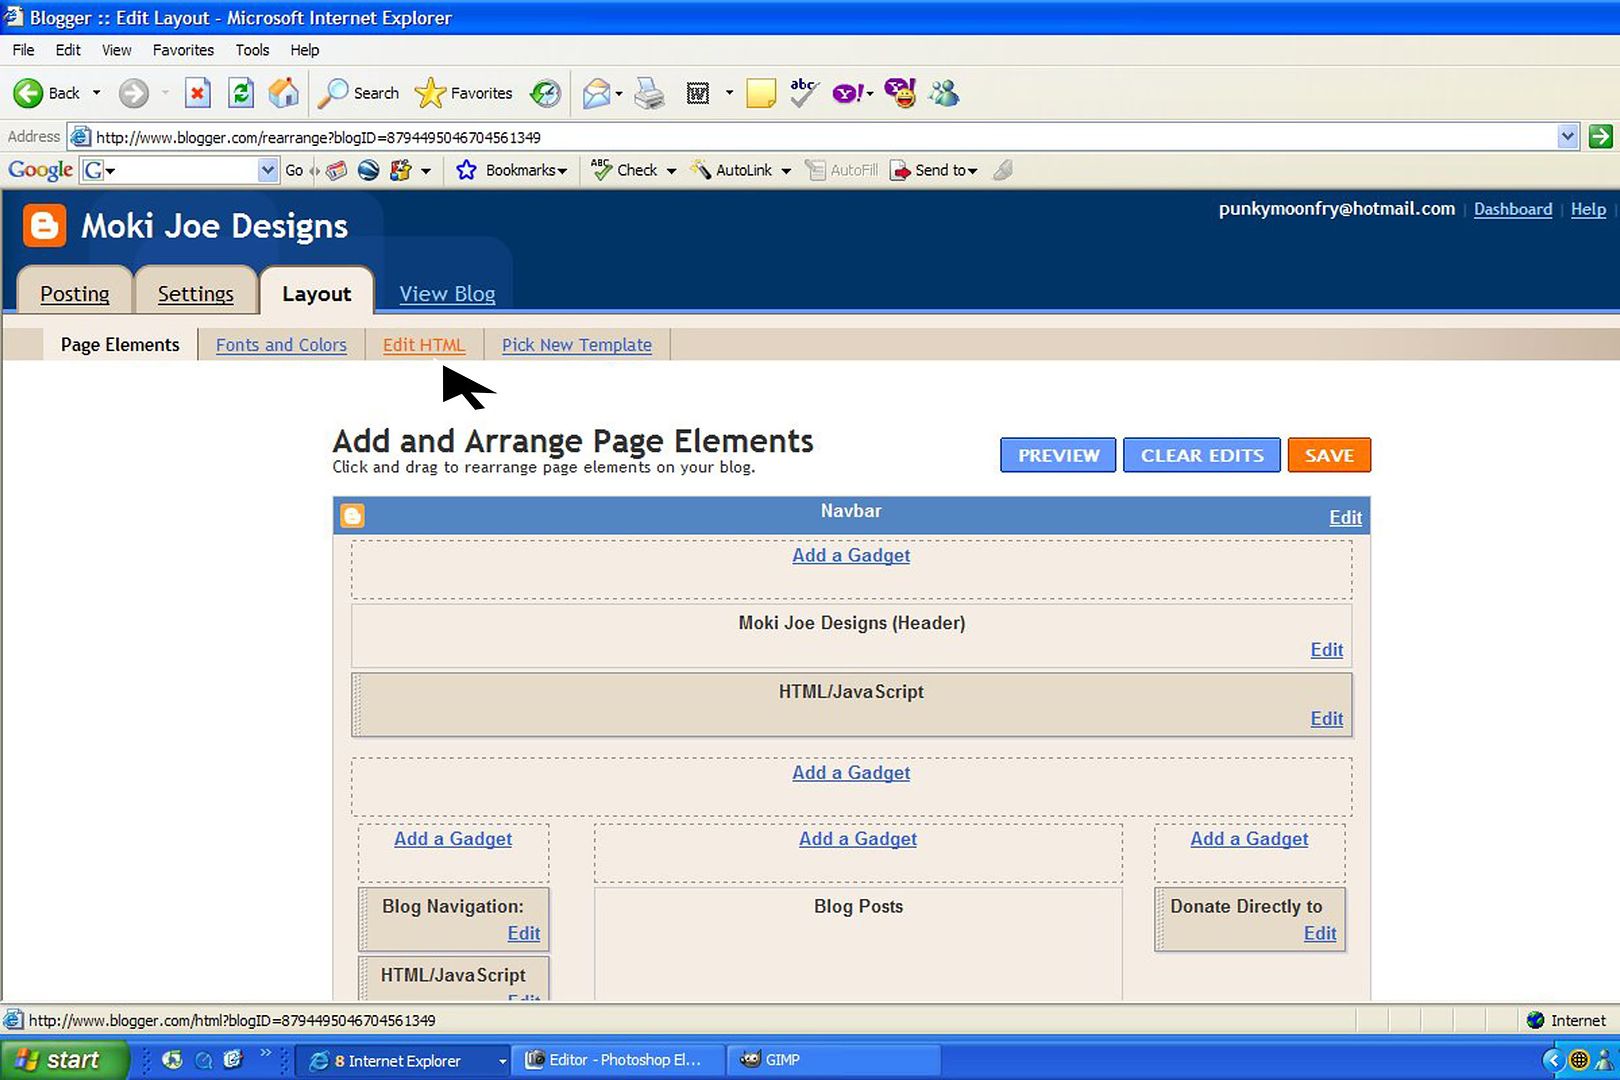
4. Once you see the "Layout" screen then click on the "Edit HTML" button. At the top of this screen you will notice that there is a place where you can download and save a copy of your current template. I always recommend saving your template before making any changes!
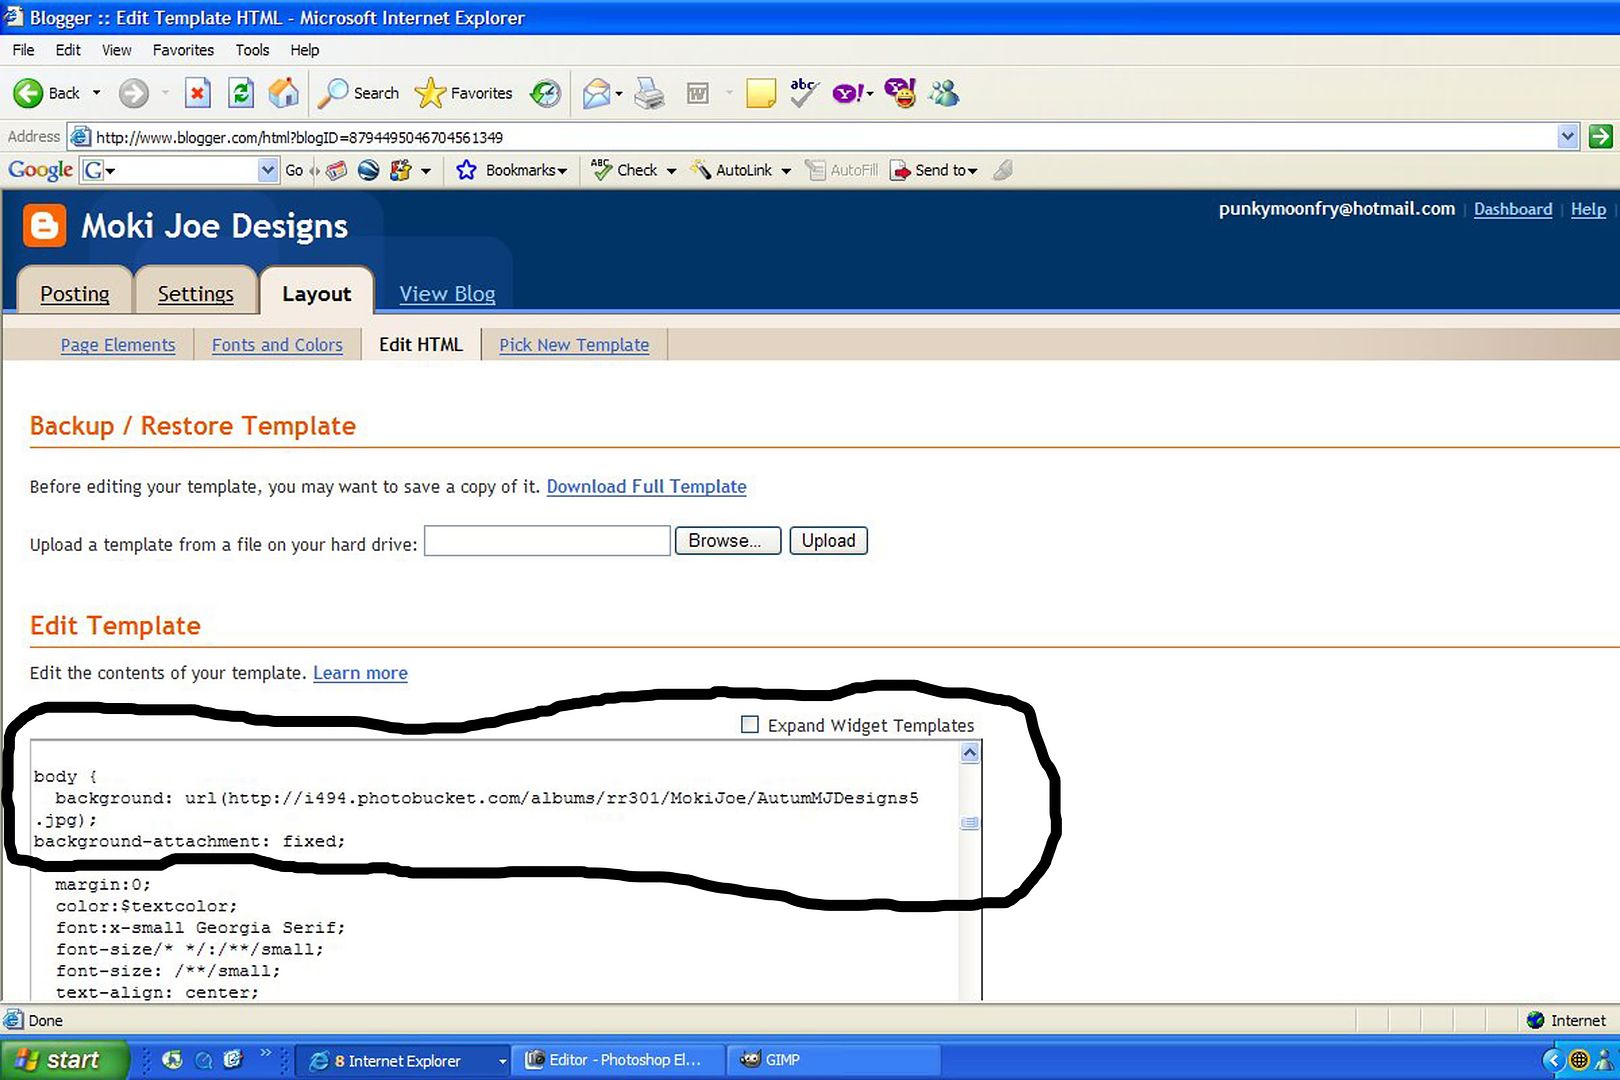
Once your template has been saved, then the fun part begins! Scroll down to just below the "Edit Template," to access your blogger CSS and HTML code. You are going to want to find the portion of your code that says "Body" as shown in the above picture. Once you have located this portion of your code, the you are going to want to add the following:
body { background: url(Insert the URL of your image which has been provided to you from your video and photo hosting site here);background-attachment: fixed;
Your code should now look exactly like the code shown in the above photo with the exception of the change in URL's.
5. Once you have changed your bloggers coding then you are ready to preview your new template. To do this, simply click on the "preview," button located at the bottom of the page, as shown in the picture below.

If you like what you see then simply click "Save Template," and your done! If you don't like your changes simply click any other command button located at the top of the screen, i.e., "Posting," "Setting," to get out of this window. Be sure not to save your changes if you are unhappy with the new look of your blog. If worse comes to worse and you dont like the new look of your blog, and you accidently hit the "save changes," button, well, simply reload the original template we saved early on!
Now go have some fun creating stylish new blogger backgrounds!
Geen opmerkingen:
Een reactie posten